

close
Choose Your Site
Global
Social Media


Views: 0 Author: Site Editor Publish Time: 2026-07-01 Origin: Site


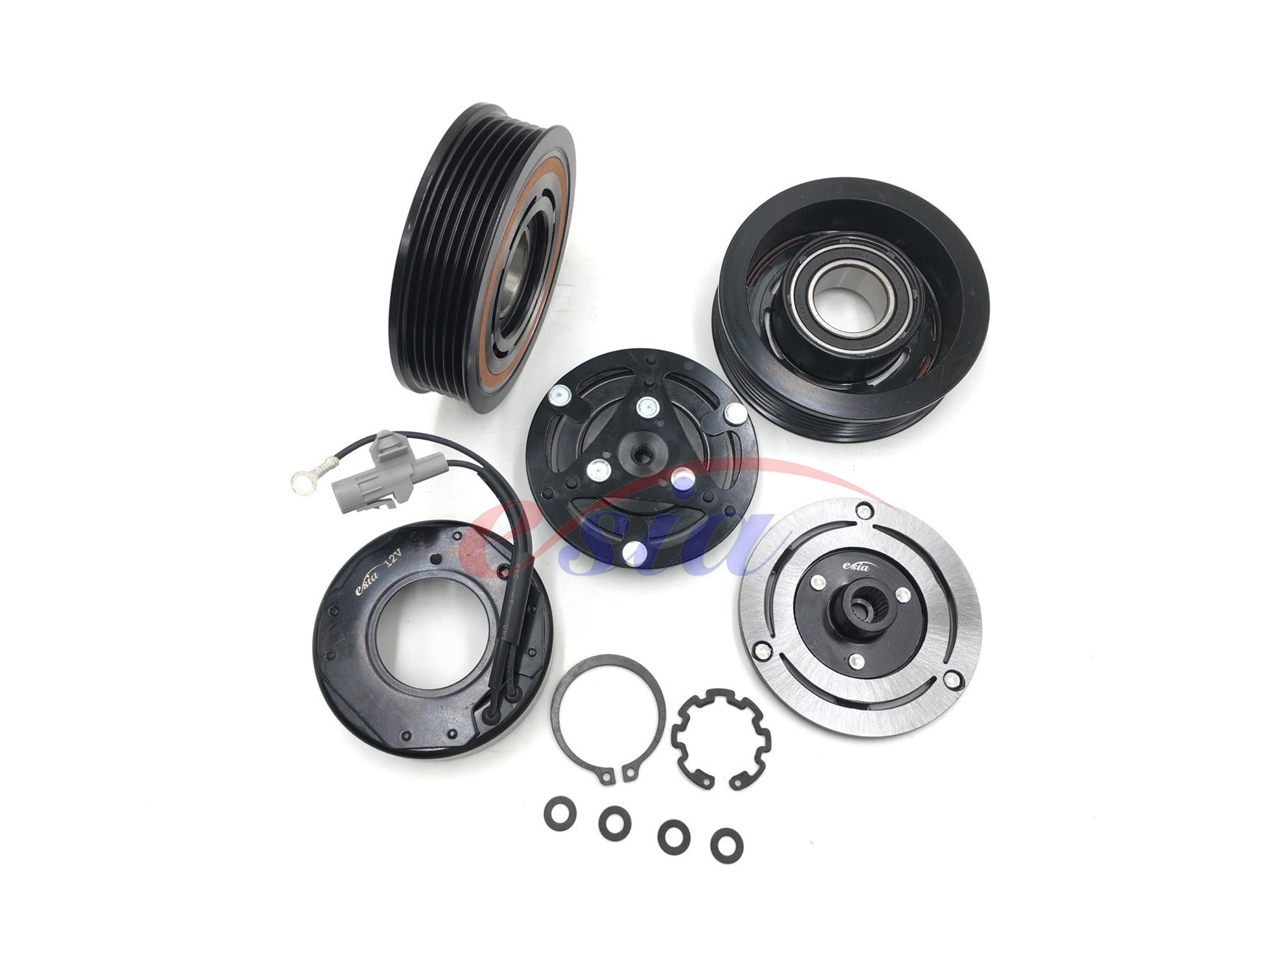
A malfunctioning air conditioning system leaves you sweating on your daily commute. Car owners often jump to the worst conclusion, assuming they need a complete and expensive system overhaul.
The reality is often much simpler. The Magnetic Clutch acts as the vital gatekeeper of your cooling mechanism. It turns system power on and off. Unfortunately, mechanics frequently misdiagnose its failure, leading to unnecessary component replacements.
This article will equip you with clear diagnostic criteria to pinpoint the exact issue. We will help you confidently determine if you face a simple mechanical failure or a catastrophic internal breakdown. You will learn the exact evaluation steps needed to get your cabin cold again.
Symptom Identification: Intermittent cooling, grinding noises, or a visibly stationary compressor faceplate are primary indicators of a failing magnetic clutch.
The Financial Impact: Replacing a car AC compressor clutch assembly is significantly cheaper than replacing the entire compressor unit.
Diagnostic Logic: Proper evaluation requires isolating electrical delivery (relays/fuses) from mechanical wear (air gap/seized bearings).
Implementation Reality: While a clutch-only replacement saves money, space constraints in the engine bay often dictate whether the repair can be done without evacuating the refrigerant.
When your cabin temperature rises unexpectedly, you must identify the symptoms early. Recognizing these warning signs saves valuable diagnostic time. A failing car AC compressor clutch presents several distinct physical and auditory clues.
Start your engine and turn the air conditioning to its maximum setting. Pop the hood and locate the compressor unit. You should see the front plate spinning rapidly in unison with the belt. If this front plate remains completely stationary while the outer pulley spins, the mechanism has failed to engage. The coil might lack electrical power. Alternatively, the physical air gap may have grown too wide.
You might notice the air blowing cold initially. Then, it suddenly turns warm as the engine bay heats up. This points directly to an expanding air gap. Thermal expansion occurs as under-hood temperatures rise during your drive. The metal expands, pushing the friction surfaces further apart. Eventually, the electromagnet cannot overcome this increased distance. The cooling cycle simply shuts down until the engine cools off again.
Listen closely to the compressor area. Squealing, grinding, or loud rattling noises signal serious mechanical trouble. A constant grinding sound usually indicates a failing pulley bearing. If you hear metal-to-metal squealing when the system engages, the friction plates are likely slipping. Ignore these sounds, and the bearing could seize completely, destroying the drive belt.
A slipping plate generates massive friction. This friction produces excessive heat rapidly. You will often notice a distinct smell of burning rubber entering the cabin. You might also smell melting electrical components. This odor happens when the electromagnet coil gets too hot and begins melting its internal epoxy housing. Stop using the system immediately if you smell burning materials. Continuing to run it will cause further component damage.
Evaluating whether to invest in a localized repair or a full system overhaul requires strict mechanical logic. You must accurately determine the health of the internal compressor body before buying any parts.
You can often salvage the situation by replacing the magnetic clutch for compressor components alone. Look for these specific conditions during your inspection:
The compressor shaft turns smoothly by hand while the engine remains completely off.
The overall system holds adequate refrigerant pressure without any detectable leaks.
The identified failure remains isolated strictly to the coil, the outer bearing, or the friction plate.
Sometimes, the external failure actually indicates deeper internal destruction. You must replace the entire unit under these specific conditions:
The internal shaft is completely seized and refuses to turn manually.
You find internal metal shavings circulating in the lines. Mechanics call this phenomenon "Black Death." It requires a comprehensive system flush, a new condenser, and a new compressor.
The primary compressor seals are actively leaking pressurized refrigerant into the atmosphere.
Use the following table to map your symptoms directly to the correct repair path.
Symptom / Condition | Indicated Component Failure | Recommended Action |
|---|---|---|
Shaft turns smoothly, clutch plate seized | Bearing or Friction Plate | Replace Clutch Assembly Only |
Infinite resistance on coil test | Stator Coil Burnout | Replace Coil / Clutch Assembly |
Shaft locked rigid, belt squealing | Internal Compressor Seizure | Full Compressor Replacement |
Dark, sludgy oil at fittings | Internal Contamination | Full System Overhaul & Flush |
Diagnosing an automotive air conditioning clutch requires a systematic approach. You must separate electrical faults from purely mechanical failures. Follow these steps to isolate the root cause effectively.
Safety comes first. Ensure the engine is completely turned off and the keys are removed. Reach down and manually spin the front clutch plate. It should offer some slight resistance but turn smoothly. If it is seized tight, the internal compressor is likely locked. Next, spin the outer pulley. A harsh grinding sound indicates a bad bearing. A smooth, silent rotation means the bearing remains healthy.
You need to prove power is actually reaching the component. Open your under-hood fuse box. Find the specific relay controlling the AC system. Swap this relay with an identical one in the fuse box, such as the horn relay. Test the system again. This rules out a simple, inexpensive switch failure. Next, disconnect the wiring harness at the compressor. Hook up a digital multimeter set to DC volts. Start the car and turn the AC on. Verify the harness delivers a steady 12 volts.
If you have 12 volts at the plug, the coil itself might be dead. Switch your multimeter to the Ohms setting. Measure the resistance across the two terminals on the coil side. Standard readings typically fall between 2 to 5 ohms. If the meter displays infinite resistance, you have an open circuit. This means the internal wire has burnt out entirely. The coil requires immediate replacement.
Sometimes the coil works, but the distance is just too great. Grab a set of feeler gauges. Insert the gauge blades between the front plate and the main pulley. Compare your measurement to the exact manufacturer specifications. Most vehicles require a gap around 0.35mm to 0.60mm. An excessive gap prevents the electromagnet from pulling the plate in successfully. You can sometimes fix this by removing a shim behind the plate.
Common Mistake: Do not attempt to force a feeler gauge in. It should slide between the plates with a slight, even drag. Forcing it skews your reading and hides the true gap distance.
Understanding why components fail helps you prevent future breakdowns. Several distinct factors contribute to the gradual destruction of the assembly. Recognizing these root causes ensures your repair lasts.
These components endure extreme stress daily. Over tens of thousands of engagement cycles, the primary friction material simply wears down. Think of it exactly like your vehicle's brake pads. As the material vanishes, the air gap increases steadily. Eventually, it grows beyond the magnet's physical pull capacity. The system stops engaging entirely.
The under-hood environment is incredibly harsh. Constant heat cycling and natural aging cause the protective epoxy housing to turn brittle. The electromagnet vibrations eventually crack this hard casing. Moisture and debris enter the cracks, leading to internal short circuits. A shorted coil loses its magnetic strength immediately.
Compressor shaft seals wear out over time. A leaking front seal can slowly coat the entire external assembly in heavy refrigerant oil. This thick oil ruins the friction surfaces. It causes the plates to slip constantly when engaged. The continuous slipping generates massive heat, ultimately burning out the coil and destroying the bearing.
An overcharged AC system places immense strain on moving parts. Failing condenser cooling fans create the exact same issue. Both scenarios force the compressor to work much harder to pump refrigerant. This extreme load causes the engagement plates to slip under pressure. Prolonged slipping under high load leads to catastrophic overheating.
Once you verify the exact point of failure, you face a logistical decision. You must choose between attempting a DIY repair or taking it to a professional shop. Both paths carry distinct implementation risks.
A competent home mechanic can handle an assembly swap. It requires patience and specific tools. However, professional shops possess dedicated equipment and lift access. Professional technicians can often complete the job faster. They also provide warranties on their labor. You must weigh your personal mechanical comfort against the convenience of a professional facility.
Targeting the specific failed component makes excellent financial sense. Sourcing the outer assembly alone represents a fraction of the expense of a full system overhaul. A full replacement involves extensive labor hours. It also requires specialized machinery to safely extract and recharge the chemical refrigerant. By isolating the fault to the external components, you bypass these heavy labor and fluid costs entirely.
You cannot approach this job with basic hand tools alone. Removing the assembly safely requires specific holding tools to prevent the shaft from spinning. You also need heavy-duty snap-ring pliers. In many cases, a dedicated puller tool is mandatory to slide the old pulley off the snout.
Clearance issues present the biggest hurdle. On many modern transverse-engine vehicles, the frame rail sits inches away. There is simply not enough physical clearance to remove the pulley while the unit remains mounted. This strict space constraint forces you to unbolt the entire unit. Unbolting it mandates legally recovering the refrigerant and pulling a deep vacuum afterward. Always inspect your engine bay clearance before buying parts.
Do not rush your component purchases. Verify your electrical voltage and measure your air gap first. Ensure the internal shaft spins freely without grinding. If the internals prove healthy and your frame clearance allows it, source an OEM-equivalent part. Taking these deliberate steps ensures a successful, long-lasting repair.
Diagnosing these electrical and mechanical systems systematically prevents unnecessary stress. Taking the time to test components individually saves you from undertaking high-cost overhauls. You now know exactly how to measure resistance, check relays, and verify internal health.
Always trust your multimeter readings over guesswork. Check the physical clearances in your engine bay before beginning any disassembly. Confirm electrical delivery and internal shaft health thoroughly before purchasing replacement parts. Following this structured approach gets your vehicle cooling reliably once again.
A: Yes, provided your specific vehicle has enough physical clearance. You need sufficient space between the compressor snout and the vehicle frame rail to slide the pulley and snap rings off. If space is too tight, you must remove the entire unit, which requires draining the system.
A: Most OEM units last between 80,000 to 120,000 miles. This lifespan varies heavily depending on your local climate and usage frequency. Constant cycling in hot, humid environments degrades the friction material and coil epoxy much faster than in cooler regions.
A: If the pulley bearing is completely seized, you can sometimes route a shorter serpentine belt to bypass the unit entirely. This heavily depends on your specific engine's belt routing diagram. Keep in mind that doing this permanently disables your air conditioning and defroster systems.


